Senin, 24 Januari 2011
Our ability to accessorize is what separates us from the animals…
That joyous time of year again. The time of year where everyone declares what they are going to do in the New Year better than they did the year (or years before). For some it is motivation, but to me the changing of the year only means one thing…I will write the date wrong on everything for a month. ![]()
I thought about doing a Best of 2010 like a lot of bloggers do, but quite honestly, I am all about looking forward to the future rather than looking back into the past. Certainly we can learn a lot by looking at our past, but dwelling on it can be a bad idea. Reading many of my friends resolutions so many of them are ridiculous ones like “get back to the size I was in high school”. First off that does me no good, as I was no petite flower back then either. And second it also doesn’t help you be happy with the current you. And if you aren’t happy no one around you is either. So forget about squeezing into your old jeans and just buy more handbags and necklaces. Accessories will fit you no matter what your size (rings sometimes don’t qualify, but with the right amount of lotion you can make it fit).
Me, I’m not dwelling on anything. I’m not making a list of all the things I am going to do in 2011. I will tell you the things I’m NOT going to do (or at least that’s the plan).
1. Pose naked. I’m sure you can rest easier knowing that (sorry F)
2. Watch the Jersey Shore.
3. Go cow tipping.
4. Call up the owner of the Philadelphia Eagles to praise the team for giving a second chance to Michael Vick.
5. Explore the world of glitter eye shadow.
6. Be drafted by the NHL.
7. Tell people how many calories something is while they are eating it.
8. Become a famous athlete and send photos of my private parts to people….I will only do that when I am not a famous athlete. ![]()
9. Give up eating ice cream just because I am allergic to dairy…that’s what the pills are for right?
10. Be featured on the People of Wal-Mart website.
What about you? What will you NOT be doing in 2011?
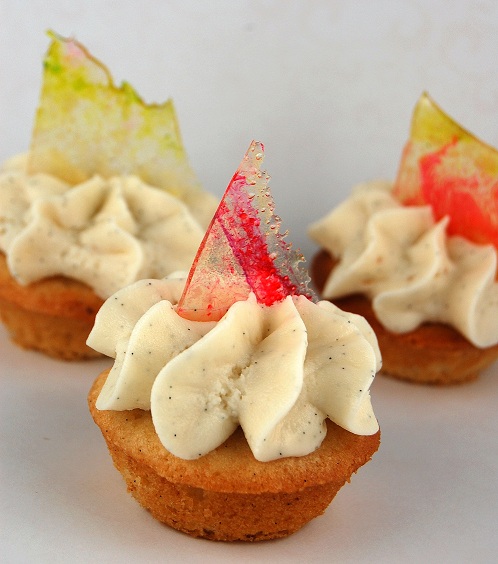
So in honor of just buying more accessories, I accessorized my cupcakes a little. I originally just wanted a vanilla malted cupcake (mini of course so you can eat more of them). But they seemed so plain for a New Year’s treat. I have been obsessed with malted milk powder as of late. It’s hard to find so when I do, I stock up on it. Mine is made by Carnation (hey Carnation, want to send me free Malted Milk Powder…please do!). I love the flavor it gives. But then again I think Whoppers should be its own food group. I even added it to my sugar cookies this year for Christmas.
The stained glass candy is something from my pastry school days. But it’s not that hard, you just have to catch the sugar before it turns a caramel color. Helen over at Tartlette did some really pretty stained glass caramel awhile back and you can see hers, here.
I hope everyone has a safe and happy New Year’s Eve. I am staying in. Me and the pup. Probably some bubbly I have been saving and some cheesy John Hughes movies. Have to be up on New Year’s Day to watch the Winter Classic. ![]()
Cheers my friends and see you in the year 2011!

Malted Vanilla Bean Mini Cupcakes with Stained Glass Candy
Malted Vanilla Bean Mini Cupcakes:
1 ½ cups self-rising flour
1 ¼ cups all-purpose flour
½ cup malted milk powder (Carnation makes this…if you can’t find you can use Ovaltine but that will give it a chocolate flavor that the regular malted milk does not)
1 cup (2 sticks) unsalted butter, at room temperature
2 cups granulated sugar (preferably superfine)
4 large eggs, at room temperature
1 cup whole milk
2 vanilla beans, beans scraped and pods discarded
Preheat oven to 350 degrees F.
Line two 24 cup mini muffin tins with cupcake papers or spray with baking spray.
In a small bowl, combine the flours and malt powder. Set aside.
In a large bowl, on the medium speed of an electric mixer, cream the butter until smooth.
Add the sugar and gradually and beat until fluffy, about 3 minutes.
Add the eggs, 1 at a time, beating well after each addition.
In a medium bowl whisk together the vanilla beans and milk.
Add the dry ingredients in 3 parts, alternating with the vanilla bean milk. With each addition, beat until the ingredients are incorporated but do not over beat.
Using a rubber spatula, scrape down the batter in the bowl to make sure the ingredients are well blended. Carefully spoon the batter into the cupcake liners, filling them about 3/4 full. Bake for 13-15 minutes, or until a cake tester inserted into the center of the cupcake comes out clean.
Cool the cupcakes in tins for 10 minutes. Remove from the tins and cool completely on a wire rack before frosting.
Malted Vanilla Bean Buttercream Frosting:
1 cup (2 sticks) unsalted butter, at room temperature
6 to 8 cups confectioners’ sugar
1/2 cup milk
1/3 cup malted milk powder
2 vanilla beans, beans scraped and pods discarded
Place the butter in a large mixing bowl. Add 4 cups of the sugar and malted milk powder.
Then the milk and vanilla beans.
On the medium speed of an electric mixer, beat until smooth and creamy, about 3 to 5 minutes. Gradually add the remaining sugar, 1 cup at a time, beating well after each addition (about 2 minutes), until the icing is thick enough to be of good spreading consistency.
You may not need to add all of the sugar. If desired, add a few drops of food coloring and mix thoroughly. (Use and store the icing at room temperature because icing will set if chilled.) Icing can be stored in an airtight container for up to 3 days.
Cupcake recipe adapted from The Magnolia Bakery Cookbook: Old-Fashioned Recipes From New York’s Sweetest Bakery by Jennifer Appel and Allysa Torey
Stained Glass Caramel
1 cup granulate sugar
2 1/2 TBSP water
Various food colorings
Line a baking sheet with parchment paper. Drop a few drops of food coloring onto the paper. Do not touch them, swirl them or move them.
In a heavy saucepan, combine the sugar and water, do not stir and bring to a boil over high heat. Continue to boil until the caramel reaches the soft crack stage or 140C – 285F on a candy thermometer (do not let it turn color). Immediately pour over the parchment paper with the food coloring.
Take the baking sheet with your hands and move it left to right, right to left to move and swirl the colors. Let set until completely cooled. Break pieces of your desired size to decorate the cakes with.
Candy recipe from Tartlette.com

The Great Nutella Debate…

I had a junior high student who was kind of a loner and would spend many a lunch hour debating with me just for the fun of it. Not arguing with me, he would just pick what seemed to be random topics to talk about for debate. One day there was a jar of Nutella that a fellow teacher had picked up for me (it wasn’t so easy to find back then). The student asked me what that was (chocolate-hazelnut spread, in case for some reason you don’t know) and I told him that I used it for baking but that I knew some people put it on toast and ate if for breakfast. This sparked him right away and thus began our debate about whether or not Nutella is a good breakfast or not. Right away I was going to win this one, as this is the kid who half the time eats a bag of Flaming Hot Cheetos and a Mountain Dew on the way to school, so odds were not on his side. After discussing for about 10 minutes he succeeded that if you can serve a kid a Frosted Pop Tart, Toaster Strudel, Frosted Flakes, or a donut for breakfast, then surely yes, you could have Nutella for breakfast. And though he lost that one so to speak, he did his fair share of winning those debates.
People ask me if I go back to teaching full time will I go back to teaching junior high? My answer is most likely no. But not for the reason people think. Most think because junior high kids are a pain in the butt. Some are. But most are not. Junior High kids are funny, smart (way smarter than what they are given credit for), witty (with great sarcasm, which I fully appreciate), hormonal, and a bit mixed up. It’s just a tough age, and quite honestly the parents tend to make it even harder for them. Some still want to be a kid in junior high. Some want to be a grown up. Some are stuck in between. Then the kids who still want to be kids get picked on for not wanting to be more grown up. And then you add the hormones and it’s all a big mess.
One reason why I did so well with the junior high students was because I was honest with them. I had no problems coming in and telling them I had a headache and wasn’t in the mood to deal with anything that day. Or when I broke up with a boyfriend and was feeling emotional I would tell them, and let them know that I was extra sensitive so it was best not to misbehave because what might not normally bother me, would that day. The honesty was always appreciated and rewarded so to speak. I think parents think of their junior high kids as children still. And they are. But they aren’t as dumb as most of their parents seem to think they are. They know why you are fighting. They just want to hear it from you. Yes having to tell your child that daddy lost his job is hard and will probably make the kid nervous. Though no more nervous than him/her sensing something is wrong and you won’t tell him/her what is wrong so as not to upset him/her. Great plan. Then you have the parents who swing the opposite way and try to be the best friend. Don’t get me started on that. They already have friends, they need parents.
So if I love junior high kids so much, why not go back? Plain and simple…single subject. I don’t like teaching the same subject over and over again. It gets old real fast for me. Some teachers love that. They love that they don’t have as much planning, that part is nice, but I still think it is way more fun to teach all the subjects. Which in this state, if I want to do that the highest grade I can teach are 5th graders, who I also like as well.
Today’s simple Nutella cookies are in honor of my debating student. He got engaged over Christmas (wow, that makes me feel way old) and I got an announcement about it (congrats to you S) These are basically peanut butter cookies, but I took out the peanut butter and used Nutella instead. Hard, I know. ![]() All I know is that they make for one heck of a breakfast treat.
All I know is that they make for one heck of a breakfast treat. ![]() Or do you not thing Nutella makes for a good breakfast?
Or do you not thing Nutella makes for a good breakfast?
*Oh and totally random is the sad but funny Crazy Cocker Spaniel in her new inflatable collar that she has to wear thanks to all the chewing she is doing. I tried the spray that is suppost to deter her, she thinks it’s a topping or something. ![]() Dogs.
Dogs.

Nutella Cookies
Preheat oven to 350F.
½ cup unsalted butter, at room temperature
½ cup granulated sugar
½ cup firmly packed light brown sugar
½ cup Nutella or other hazelnut chocolate spread
1 egg
½ tsp. vanilla
1 ½ cups flour
1 tsp. baking soda
¼ tsp. salt
1/3 cup mini chocolate chips
Cream butter and sugars in a mixer on high speed, scraping down the sides of the bowl often.
Beat for about 3 minutes, until light and fluffy.
With the mixer on low, add the egg and vanilla. Then add the Nutella and mix well.
Add the flour, baking soda, and salt and mix on low speed until all the ingredients are incorporated. Increase the speed to medium and mix just until the dough is smooth. Fold in chocolate chips.
Using a small ice cream scoop (or a teaspoon) form the dough into balls and place on greased cookie sheet.
Bake 6-7 minutes. Let cookies cool about 5 minutes and transfer to a rack to cool completely.
Call the Grammar Police…
“Dear Peabody,
Your last post about Junior High students was nice. Refreshing to see a teacher who enjoys teaching that age group. However, I must encourage you to keep teaching math or science only, as I can not imagine you teaching the youth of America proper grammar that one needs to succeed in today’s society. Based on the excellent effort you put forth in your blog, I bet you are an excellent teacher as well. I just don’t think you should teach English.
Sincerely,
B”
Okay, okay point taken. That one made me laugh. ![]() While I write on my blog how I talk, I certainly know proper grammar; I choose not to use it. It’s boring and stiff, and well, not me. I have to pass tests in order to get my teaching certificate that says I know the basics. Knowing where to place a semi colon to be honest in my opinion isn’t really a life skill. And you certainly don’t need it to become a successful member of society (I really hope that part of the email was a joke). Spell check and grammar check are your friend. And even better, when you write for a living or a publication, they have these people called editors that come and slash your work up and down to make sure it fits into proper grammar form. Blah. Boring.
While I write on my blog how I talk, I certainly know proper grammar; I choose not to use it. It’s boring and stiff, and well, not me. I have to pass tests in order to get my teaching certificate that says I know the basics. Knowing where to place a semi colon to be honest in my opinion isn’t really a life skill. And you certainly don’t need it to become a successful member of society (I really hope that part of the email was a joke). Spell check and grammar check are your friend. And even better, when you write for a living or a publication, they have these people called editors that come and slash your work up and down to make sure it fits into proper grammar form. Blah. Boring.
Besides, how does that saying go, those who can’t teach. ![]() English teachers don’t send me hate mail on that one. *I must clarify that this portion is a joke. As apparently with the comment that I am a horrible person for writing that, doesn’t seem to catch on to the fact that the smiley face with the tongue sticking out means it was a joke.
English teachers don’t send me hate mail on that one. *I must clarify that this portion is a joke. As apparently with the comment that I am a horrible person for writing that, doesn’t seem to catch on to the fact that the smiley face with the tongue sticking out means it was a joke.
For the record I don’t think a lot of the math we teach is needed either. If you are worried about kids not knowing proper grammar, I worry more about the kids who can’t seem to give me back correct change without a machine telling them how much to give me back. Yikes! I really think they should have seniors in high school take a math class based solely on math that they will need in the real world. Balance a check book. What 18% interest really means. Be able to calculate what 25% off that sweater at Old Navy would be. Or how about just knowing how much 20% is to tip (I have many an adult friend who cannot do this).
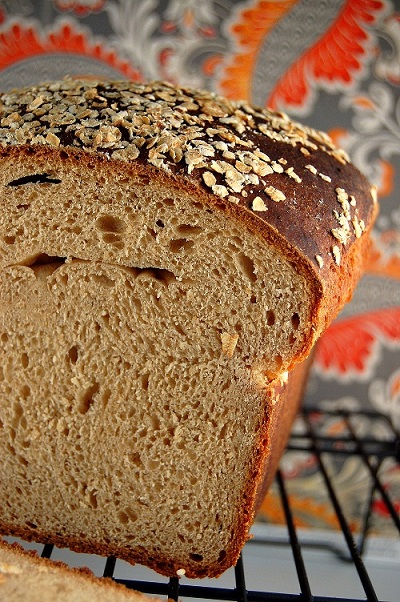
Luckily math is everywhere, even in baking and cooking. Maybe that’s why I like it so much. ![]() Bread is certainly one baking item where it is extremely important to measure exactly. I usually weigh things out in fact (hey, more math!). This is a loaf that gets made at my house pretty much every week. It’s my go to sandwich bread. And can even be made in an apartment oven…as you can see. Makes for great French toast on the weekends as well. If you are a long time reader, yes, this has been on here before, but that is way back, so why not introduce it to those who are newer to the blog.
Bread is certainly one baking item where it is extremely important to measure exactly. I usually weigh things out in fact (hey, more math!). This is a loaf that gets made at my house pretty much every week. It’s my go to sandwich bread. And can even be made in an apartment oven…as you can see. Makes for great French toast on the weekends as well. If you are a long time reader, yes, this has been on here before, but that is way back, so why not introduce it to those who are newer to the blog.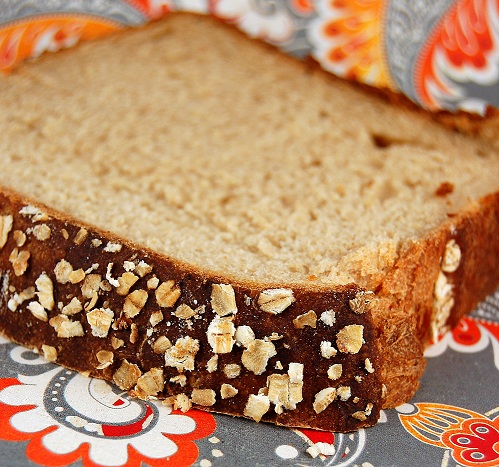
Oatmeal Buttermilk Bread
1 ½ cups rolled oats
1 cup boiling water
¼ cup water
2 tsp dried yeast
1 ½ cups buttermilk
½ cup canola oil
½ cup brown sugar
1 cup whole wheat flour
3 ½ cups all-purpose flour
2 tsp salt
1 spray bottle of water
Set aside ¼ cup rolled oats. Place the remaining oats into a medium bowl. Cover with boiling water. Mix with spoon to moisten all oats. Let bowl sit, uncovered, for 10 minutes, stirring frequently.
Place ¼ cup of warm water in the bowl of your stand mixer and sprinkle yeast on top. Mix with a whisk to dissolve yeast. Let rest for 5 minutes. Add soaked oats, buttermilk, canola oil, brown sugar, both flours, and salt. Using the hook attachment, mix on low speed for 1 or 2 minutes to combine ingredients. Increase speed to medium and mix for about 10 minutes. Dough will be wet at first, but will eventually from a ball. Ball will have a satiny finish and will bounce back quickly when poked with finger.
Place dough in an oiled, medium bowl and over with plastic wrap. Proof in a warm room, 70-75F, for about an hour. Dough will almost double in size.
Pull dough from bowl onto a floured surface and flatten it with your hands, releasing excess air bubbles. Form dough into a 12 x 6-inch rectangle and position it so that a long side is facing you. Fold the 2 short ends onto the top so they meet in the middle. Starting with the closest end, roll dough away from you into a log. Let loaf rest on its seam for a few minutes.
Transfer dough to an oiled 9 x 5 x 4-inch loaf pan, seam side down. Using your hands, push down on the dough to make sure it extends to all corners of the pan. Cover with plastic wrap and let proof in a warm room for 35-45 minutes. Loaf will rise to slightly above the top of the pan.
While loaf is proofing, preheat oven to 385F.
Remove plastic wrap and mist top of loaf with spray bottle of water. Sprinkle with remaining oats. Place pan on center rack of oven an bake for approximately 1 hour. Top and sides of finished loaf will be deep golden brown. Let cool in the pan on a wire rack for at least 30 minutes, then run a sharp knife around the sides of the loaf to release from the pan. Invert to remove loaf.
Source: Adapted from Macrina Bakery and Cafe Cookbook by Leslie Mackie with Andrew Cleary, 2003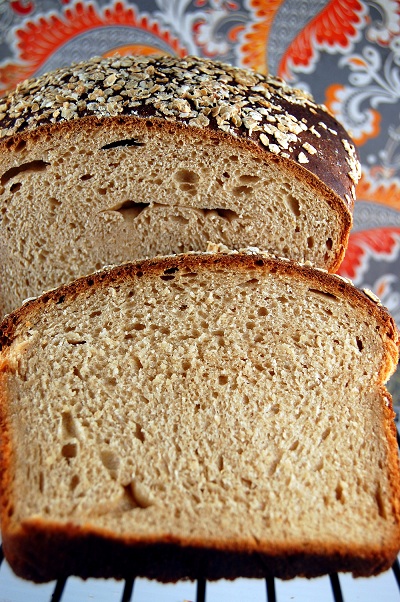
Great Expectations…
First off let me just say thanks for the support in my right to not choose proper grammar on this blog. ![]()
And now on to today’s topic:
Several of my friends commented lately about being in a funk. Many of them felt that way because their holidays didn’t go how they had planned, they didn’t get everything in they hoped to get in, etc… Or some of them are in a funk because they didn’t get accomplished all that they had planned in the 2010 calendar year.
Rosa over at Rosa Yummy Yums, wrote an excellent post about this. Why do we feel the need to set the bar so high, especially around the holidays? I have friends who were upset that they didn’t get to string their own popcorn around the tree. I did that once. Mostly just stabbed myself with a needle repeatedly and just ended up eating most of the popcorn anyway.
I myself had grandiose ideas of making a gingerbread house this year. Then I decided to save time I would just buy a premade one and decorate it. Still didn’t get that done. When Christmas passed, there it sat in the container and I felt unaccomplished. Why was I caring so much? It is just a gingerbread house after all. It doesn’t expire for a couple of months, so this year I will be doing either a Groundhog or Valentine day Gingerbread house. Who says it has to be for Christmas only? Or maybe a hockey themed just in time for the playoffs? My holiday was not made any better or worse because I didn’t have a gingerbread house. And if I don’t ever get around to doing it? Yeah, I am out $12, but the world will keep on turning…or at least I would hope so. ![]()
We have a joke in our locker room, mostly when we discuss dating…”lower your standards, better your odds”. And though we are joking, there is some truth in that. Most of the single women I know have incredibly long lists about all the things that they are looking for in a man. And if he doesn’t hit the marks on the list he is looked over. Sadly, they are probably missing out on some great guys. Now, I am not saying to throw out your core values when looking for someone but if you don’t have six pack abs, maybe insisting that the person you date has to have them is asking a bit much. For the record, the women seem to have the long list. The men just seem to have one…looking for a girl willing to let me see her naked. ![]()
People are so hard on themselves these days. Look a certain way. Live in a certain place. Drive a certain car. Always wishing that they could have what others seem to have. Wanting to be the size you were back in high school, and sorely disappointed if you can’t make that happen. Mad at yourself because you backed out of the 10K your friend talked you into running for motivation to get back into shape. When will you ever be good enough? Trying to keep up with other people’s expectations is exhausting. I know, I tried for awhile. You know what? No one seemed to care. I think we too often build up what we think other people’s expectations are in our head, when really they didn’t have any for us at all. I know I don’t have expectations for my friends, except to simply be my friend and accept me for who I am. If people can’t handle the real you, why do you want them in your life anyway?
Take a breath. Realize all that you have. I promise if you take the time to look you have a lot. A lot. And if you don’t have a lot, what can you do about it to change? If you are truly that unsatisfied, what can YOU do to make the difference? I say YOU because it really is up to you. You are the only one person you can truly control. And even I can’t do that half the time…especially around baked goods. ![]()
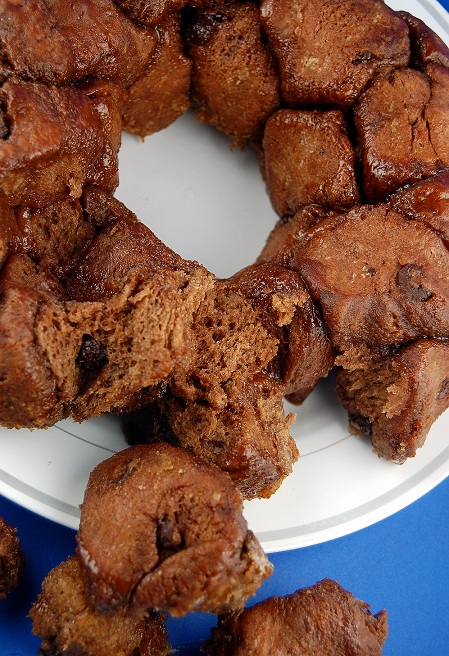
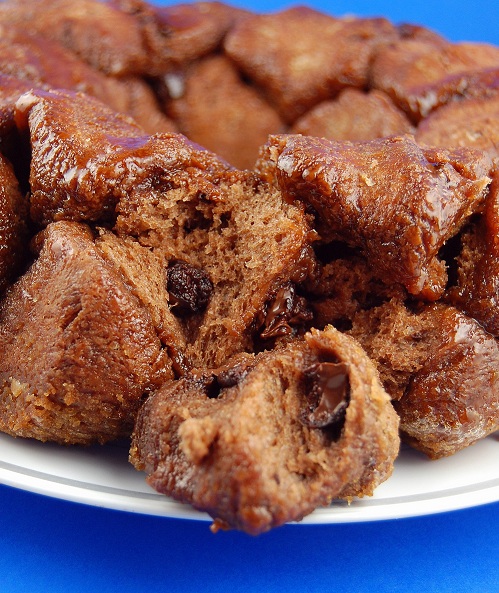
Speaking of not gaining control around baked goods, I decided after the Nutella post, what other ways can I get chocolate into my breakfast routine. ![]() Why Monkey Bread of course. I realized after 5 ½ years I don’t have one single Monkey Bread recipe on here. That is probably because I cheat and use biscuits from the store. Don’t judge that’s the way my mom made it and I am used to it that way. But I’m going a little above and beyond and made it this time with Chocolate-Chocolate Chip Brioche. Mostly just because I am still trying to see what I can get this apartment oven to produce. So far it’s been alright. I have had to swear at it from time to time. But overall it’s cooperating…I find threatening it with violence has helped.
Why Monkey Bread of course. I realized after 5 ½ years I don’t have one single Monkey Bread recipe on here. That is probably because I cheat and use biscuits from the store. Don’t judge that’s the way my mom made it and I am used to it that way. But I’m going a little above and beyond and made it this time with Chocolate-Chocolate Chip Brioche. Mostly just because I am still trying to see what I can get this apartment oven to produce. So far it’s been alright. I have had to swear at it from time to time. But overall it’s cooperating…I find threatening it with violence has helped. ![]()
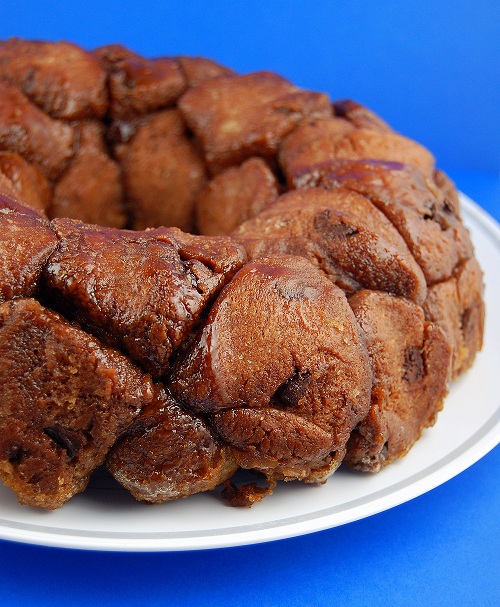
Chocolate-Chocolate Chip Brioche Monkey Bread
2 cups brown sugar
¼ cup unsalted butter, melted
Chocolate brioche (recipe follows)
Lightly grease a standard 10-in Bundt pan with vegetable oil. Set aside.
Place brown sugar in a small bowl. Place melted butter in a nearby bowl.
Turn dough out onto a very lightly floured surface and gently deflate so that dough is relatively flat. Using a knife or a bench scraper, cut off small pieces of dough to form 1/2 to 1-inch balls. The smaller you make them the stickier the monkey bread tends to be. As you cut each piece of dough, roll it into a ball in the palms of your hands. Dunk each ball in butter, use tongs or a fork to remove it and transfer it to the sugar to be thoroughly coated. Place all coated dough balls into prepared Bundt pan.
Once all balls have been coated and places in the pan, cover the pan lightly with plastic wrap and let bread rise for 60 minutes, until almost doubled in size.
Preheat the oven to 350F.
Bake for 30-35 minutes. Bread will spring back when lightly pressed.
Let bread cool in pan for 10 minutes, and then turn out onto a serving platter. Serve immediately, as it is best when eaten warm.
Chocolate Brioche (makes 2lbs of dough)
For the Chocolate Butter:
2 ounces semisweet chocolate, finely chopped
1 stick (4 ounces) unsalted butter, at room temperature
¼ cup unsweetened cocoa powder
Melt the chocolate using a double boiler. Once melted set aside and keep at room temperature.
Using a stand mixer fitted with the paddle attachment, beat butter until smooth; add cocoa powder and chocolate beat until well incorporated. Set aside at room temperature.
For the Sponge:
2 ½ tsp. active dry yeast
¼ cup warm water
¾ cup lukewarm coffee
½ cup all-purpose flour
1/3 cup sugar
Combine yeast and water in the bowl of a standing mixer fitted with the paddle attachment and whisk until he yeast is dissolved. Let stand for 5 minutes.
Add remaining ingredients, forming a thin batter. Cover with plastic wrap and let rest at room temperature for 30 minutes until bubbles form.
For the Dough:
3 cups all-purpose flour
1 ¾ tsp. salt
4 egg yolks, lightly beaten
4 ounces semisweet chocolate chips
Shift flour and salt into sponge.
Add yolks, and mix with paddle attachment on low speed for 2 minutes, until yolks are absorbed.
Increase to medium speed; knead for 5 minutes or until smooth and satiny.
On medium low speed, add chocolate butter one tbsp. at a time.
Switch to dough hook; knead until very well developed, smooth and shiny. Add chocolate chips, mix on low until incorporated.
with plastic wrap and let rise for 2 hours until double (mine took longer as my apartment is super cold). Punch down and rise again until double, about 45 to 60 minutes (or refrigerator for 4hours or overnight).
Brioche recipe adapted from The Secrets of Baking by Sherry Yard
Under the sea…

I have always wanted to go Great White Shark cage diving. Since as long as I can remember, this was always a goal of mine before I hit 40. Well, 40 is a coming and unless I become very wealthy somehow quickly, I don’t see that happening. But I still want to do it. Most everyone I know thinks I am insane about this, they think I will somehow die as a result of this. I have always been fascinated by sharks ever since I was a little kid. I forever wanted to be a marine biologist and study sharks. That was until I realized that I hated biology. Hate of biology aside, I still love sharks.
So since I know that my goal of doing it by 40 isn’t happening, I started to think, what a great way to die. I mean that is why most of my friends think is going to happen anyway (even though I have yet to read any story about someone dying while doing this). I just think about those people that read the obituaries in the newspaper each week. There among the Bob Your Name Here, 63 died of cancer; Or Sue Your Name Here, 71, died of complications of diabetes; you would find Peabody Rudd, 94(I’d like to live a long life) died in a Great White Shark attack off the South African coast. Her body was mistaken for a seal and was ripped from limb to limb. Oh sure gory, but you would so stick out.
Alright enough talk about death. We will talk about my love of cookie cutters. I have more than I like to admit, and almost all of them are a little out there. I love to make them for people and get their reaction. “Is that President Lincoln’s head?” Why yes, yes it is. Nothing says Happy President’s Day like sugar cookies in the shape of Lincoln and Washington’s heads. Or how about the irony of National Dental Month with cookies in the shape of a tooth and tooth brush. I have aardvarks, armadillos, Eiffel towers, pi symbols, roosters, bugs, hippos, and a whole lot of other ones…and of course a shark (PS, if you have a really weird one feel free to send one to me!)
I originally planned on making Great White Sharks. But I decided that I would glaze these instead of full out frost them. I had Tangerine juice in the fridge (fighting off a cold) and so I used that. Lazy me decided to drizzle the glaze instead of completely cover them…and with that they became Tiger Sharks. Tangerine Tiger Sharks sounds more fun anyway. ![]() These have malted milk powder in them, yes, I am obsessed. I just love the flavor it adds to things, especially cookies.
These have malted milk powder in them, yes, I am obsessed. I just love the flavor it adds to things, especially cookies.
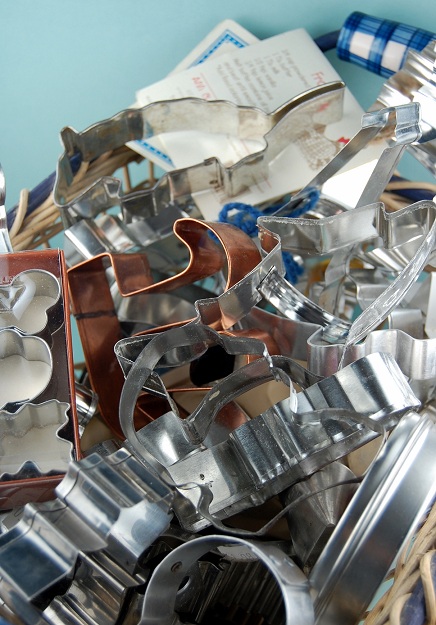
Tangerine Glazed Tiger Shark Cookies
Malted Milk Cookies:
4 cups all-purpose flour
3/4 cup malted milk powder
2 teaspoons baking powder
1/2 teaspoon baking soda
1/2 teaspoon salt
2 sticks unsalted butter, at room temperature
1 cup firmly packed dark brown sugar
1 cup granulated sugar
2 eggs
1/2 cup sour cream
2 teaspoons vanilla extract
In a large bowl, whisk together the flour, malt powder, baking powder, baking soda, and salt. Set aside.
In the bowl of a standing mixer fitted with the paddle attachment, beat the butter and sugars together until light and fluffy. Scrape down the bowl and add the eggs, one at a time, beating until each is incorporated. Add the sour cream and vanilla and beat until just incorporated. Add half of the dry ingredients all at once and beat for 15 seconds. Again, scrape down the bowl, then add the remaining dry ingredients and beat until just incorporated. The mixture should come together almost in a ball. (This didn’t happen for me, it stuck together when pressed, but not on its own.)
Loosely shape the dough into two balls, wrap them tightly in plastic wrap, and refrigerate for at least 3 hours or overnight.
Preheat the oven to 350 degrees F. Line two baking sheets with parchment paper.
Divide each dough ball in half, to make four portions. Place on portion on a lightly floured work surface and return the other three portions to the refrigerator.
Roll out the dough to about 1/4 inch thickness. The dough will be sticky, so you may have to flip and lightly flour it a few times while you work. Use a 2-inch round cookies cutter (or any other shape you want, I of course went with the shark), transfer them to the prepared baking sheets, leaving about 1 inch of space around each cookie. Extra dough scraps can be refrigerated and re-rolled, if desired.
Bake the cookies for 10-12 minutes or until they are slightly browned. (12 minutes for a crispy cookie, 9-10 minutes for a chewy one.) Allow the cookies to cool on the pan for a few minutes before transferring to a wire rack to cool completely.
Tangerine Glaze:
1 ½ cups powdered sugar, sifted
3 TBSP Tangerine juice (yes, you can use orange…but Tangerine Tiger Shark sounds better than Orange Tiger Shark ![]() )
)
Mix together using a whisk until smooth. Drizzle over cooled cookies in a stripe pattern.
Cookie recipe adapted from Baked Explorations by Matt Lewis and Renato Poliafito

Dance like there is no one watching…
“Sometimes I sing and dance around the house in my underwear. Doesn’t make me Madonna. Never will.” –Working Girl 1988
Ever notice how there are certain things you will do when it’s just you and no one else around? Like dance in your underwear? Wear a mud mask? Eat crackers as a meal? Shove tissue up your nose because you are too lazy to keep blowing it? Do Reddi Whip shots from the can? Eat an entire pan of muffins?
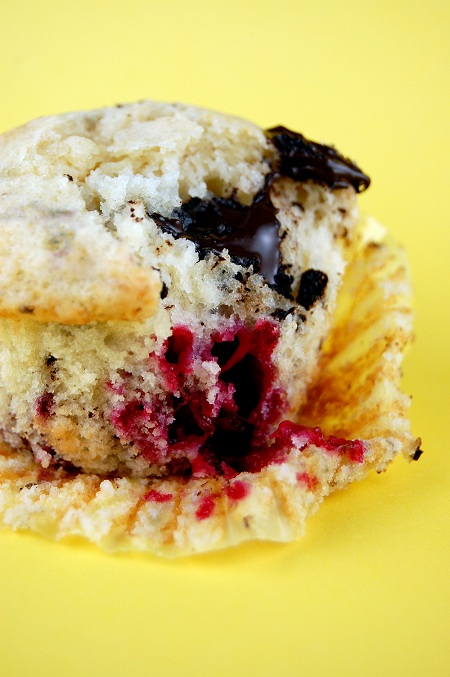
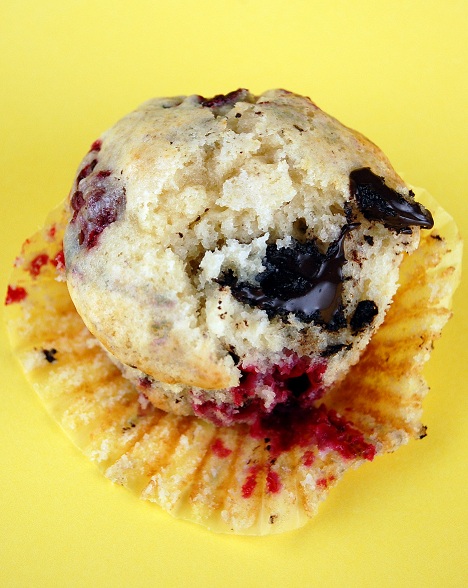
I wasn’t actually going to put these muffins up on the blog. I mean, they are just muffins. But one thing I told myself this year (kind of like my only resolution) was to put more everyday stuff up on the blog. I make stuff all the time that never makes it to the blog because I think, oh they are just muffins, or cookies, or bread. But the thing is that is what people are making on a more consistent basis than say, layer cakes. So I decided that I would show more of the everyday things I make, especially now that I am on a super budget and can’t really bake things just for the blog anymore.
These were made in order to use up some almond bark that I had at Christmas. If you don’t have almond bark, good old chocolate chips will do just fine. Though I do like the addition of the almonds in these. I buy all this candy around Christmas time and no one eats it. Then I’m stuck figuring out what I need to do with it (next up is my leftover peanut brittle). If you have white chocolate almond bark you might want to try these with blueberries and a little lemon zest.
So are there any embarrassing things you do when it’s only you?

Raspberry and Almond Bark Muffins
1 cup unsalted butter, at room temperature
1 cup granulated sugar
2 tsp. vanilla
2 eggs
2 and ¼ cups all-purpose flour
¾ tsp. baking soda
¾ tsp. baking powder
1 and ¼ cup sour cream
2 cups mixture of frozen raspberries, thawed, and patted dry
¾ cup Almond Bark, chopped up into small chunks
Cream the butter and sugar until soft about 3 to 5 minutes. Add in the vanilla.
Add in the eggs one at a time and mix until each is incorporated.
In a separate, mix together the flour, baking soda, and baking powder.
Add the flour mixture and the sour cream alternately to the egg-butter mixture in the additions. Start with the flour and end with the flour. Scrape the bowl occasionally.
Fold the berries and almond bark into the batter. Portion the muffin batter into greased tins (I use an ice cream scoop). Depending on the size of your tins, you should get about 12 to 14 muffins. Bake them for approx. 20 minutes (mine took 25 because my berries were super juicy) until they are golden brown.